How to Do a Kick (Br)ass Job of Cleaning Brass
Tom McHale 02.18.14

I’m feeling a bit cranky today. So let’s focus on the ammunition reloading step that I think is the biggest pain in the butt: cleaning brass.
At the beginning of this series, when we talked about the 10 Easy Steps of Reloading, you’ll remember that the first thing to do, after hoarding brass like it’s made of Brown Sugar Cinnamon Pop Tarts, is cleaning. Just to reiterate, you only need to remove mud, powder residue, lead, and whatever other gunk might be on your fired brass. After all, the primary purpose of cleaning brass is simply to remove loose stuff that will gum up our reloading dies and/or cause feeding problems in your gun. There is no “technical” need to make your used brass bright and shiny.
However, OutdoorHub is a class operation, so we’re going to talk about how to make it safe and beautiful. Why shouldn’t your reloads be the envy of the range?
Given the “beautiful” requirement, we’re going to dispense with the backwoods method of cleaning brass—shaking it in a bucket with some Tide, or perhaps a mixture of dish detergent, vinegar, and salt. This will make it safe, but not all that great looking.
Let’s focus on two primary methods of brass cleaning: wet and dry.
The dry method
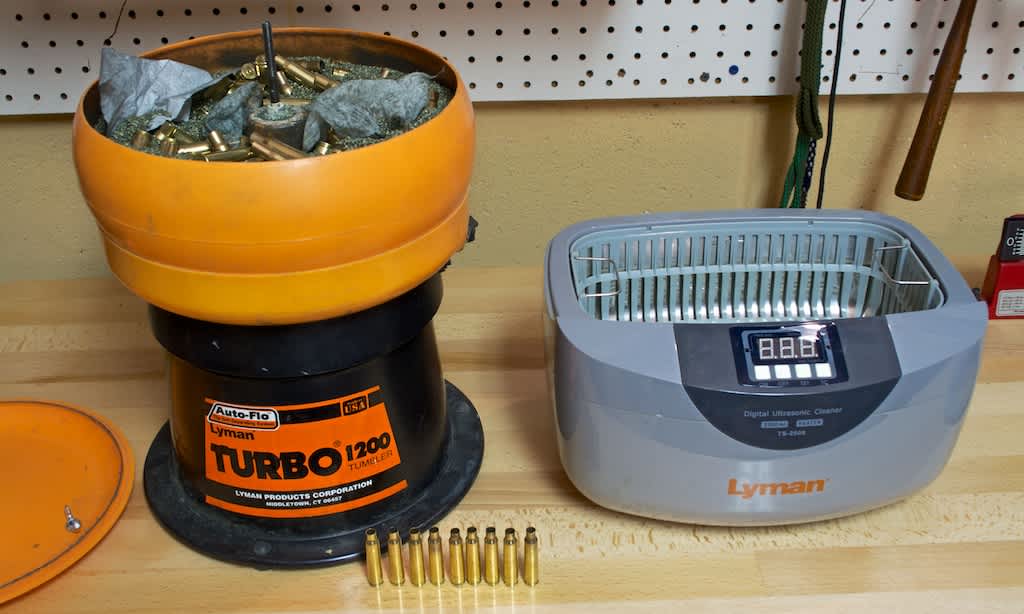
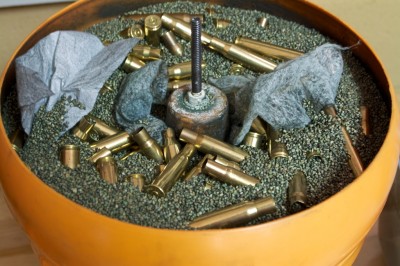
Otherwise known as tumbling, the dry method involves vibrating or tumbling the spent brass in a mixture of what reloaders call “media.” As tempting as it is to make a wisecrack about the potential uses of the mainstream media for things like scrubbing dirt, I’ll refrain. Reloading media is the material that goes in the tumbler with your brass. Media can be made of natural or synthetic materials. Typical materials include ground walnut shells, ground corn cob, and sometimes ceramic bits. Some media is impregnated with polish to help your brass come out even cleaner.
Most dry-tumblers actually vibrate; although a few models use a rotating drum like those home rock polishers. A large plastic bowl with a clamped-on lid is mounted on an electric motor that vibrates the bowl and its contents. You fill the bowl with both media and dirty brass, clamp the lid on, and let it run. It hums. It shakes. It causes neighbors to wonder if an earthquake is in progress. After anywhere from 30 minutes to a couple of hours, depending on the condition of the dirty brass, you turn it off.
Tip: The dirt from your brass needs to go somewhere, so it’s transferred to the media in the tumbling process. If you want to make your media last longer, and get cleaner brass in the process, tear a couple of used dryer sheets (like Bounce) in half and drop into the tumbler. The sheets will attract most of the dirt, keeping your media fresh for many more uses.
At this point, you need to separate the media from the clean brass. Some tumblers have a built in filter that allows the media to be drained out while the machine is running. If yours doesn’t, you can pick up a case media sifter to speed the process.

Whatever the method for separating your cleaned brass from the media, you need to be sure that all cases are completely empty of media. This can be tricky in rifle cases with small necks like the .223 Remington. While you can buy media that’s ready to go and consistent in size from reloading supply companies, some folks like to use cheaper products like ground walnut shells used for pet cage liners and such. This can work fine too. Just make sure that the grind size is small enough to easily exit the casings and large enough so it doesn’t get stuck in primer pockets and flash holes.
Tip: When dry tumbling, I prefer to clean the brass while the spent primers are still in place. This prevents media from getting stuck in primer pockets. After the brass is clean, I resize it and decap the primer in one step.
The (ultrasonic) wet method
You can also use an ultrasonic cleaner to clean your brass to like-new condition. Most reloading equipment manufacturers offer an ultrasonic cleaner and cleaning solvents for both brass and steel products. Yes, once you invest in an ultrasonic cleaner, you can use it to clean gun parts too!
The cleaning process couldn’t be easier. Fill the unit to the line with water. Add the right amount of cleaning solvent. Lower the basket of dirty brass into the mixture. Cover and run for just a few minutes. Yes, minutes. My Lyman TurboSonic unit cleans the dirtiest, nastiest range pick up brass in less than five minutes. That’s it for the cleaning part.
The gotcha is that your brass finishes the cleaning process soaking wet, so it needs to be dried. You can spread it out on a towel in the sun. If you’re feeling brave, you can put it on a cookie sheet in your oven at the lowest temperature for 15 or 20 minutes. Or, you can invest in a food dehydrator. With multiple shelves and an operating temperature of only about 150 degrees, you won’t harm your brass or offend the household chef.
Tip: When using an ultrasonic cleaner, I like to use a general purpose decapping die to remove spent primers first. This cleaning method will will do a nice job of cleaning the primer pockets and flash holes. It also helps the wet cases dry faster. Once the brass is clean and dry, you can then resize it.
I would be remiss if I didn’t admit that I bent the rules a little bit by dividing the methods into wet and dry. There’s a hybrid option that’s gaining in popularity among the reloading geeks. It’s a wet method, but uses tumbling media made of small stainless steel pins. It does a fabulous job as it combines the best of both worlds. One benefit of the wet stainless steel pin media method is that the pins are small enough to clean the primer flash holes, so your brass will get completely cleaned and polished—inside and out. Of course, you still need to dry your brass thoroughly after cleaning.
Which method should you use?
So, what’s the best method? That depends.
With dry tumbling, you can clean brass straight from the range—no decapping required. However, mixing calibers in the same batch can be problematic as the vibration tends to jam smaller-caliber brass (like .32 and 9x19mm) the larger cases (like .40 and .45 ACP). You’ll need to periodically replace the media, but no drying is required.
With the ultrasonic method, you can throw all brass from the range bucket in the cleaner at once and not worry about cases getting jammed into each other. You don’t have to remove primers first, but you’ll get better results if you do. It does a great job of cleaning, but doesn’t get brass as shiny as dry tumbling. And you’ll have to dry the brass, of course.
In the end, it’s up to you.
By definition, ammunition reloaders are a resourceful bunch, so I’m quite sure you folks have discovered lots of other brass cleaning tips. What tricks do you have up your sleeve?

